Showing posts with label Good Eats. Show all posts

February 26, 2013

Got Milk? Homemade Coconut Milk


When I was making the transition from a vegetarian to more plant strong vegan diet - cow milk was one of the first (and most easily) things that I eliminated from my diet. Ya'll should know that I don't really like to preach but milk squeezed from some artificially inseminated cow who had her baby calf taken from her, but is then given who know what hormones and drugs to keep her lactating for as long as possible - so that I can enjoy a splash in my morning coffee?? Yes, strangly I had a very easy time giving up this morning ritual in place for one of the many yummy alternatives available.

Over the last few years I have tried several types of milk alternatives. Soy, coconut and almond remain my favourites. Recently I learned that some of the stabilizers added to these milk alternatives can irritate the tummy. If you drink the regular dairy products don't relax yet- you are included in the stabilizer party. 

Carrageenan is extracted from red seaweed (sounds harmless enough) and is used in many dairy and milk products as a stabilizer and thickener. Unfortunately, studies dating all the way back to the 1960's have shown carrageenan to be linked to gastrointestinal diseases. As someone who suffers from a 'sensitive belly' I am always on the look out for food additives that may be adding to my problem.

The long and short of it......I doubt there is any reason to run in a panic around your home throwing away everything that contains carrageenan. However, next time you are shopping for dairy products or dairy alternatives, maybe compare ingredient lists of various brands and select those that do not use carrageenan.

For more information on foods that contain carrageenan follow this link.

One sure fire way to know exactly what is going into your milk.... make it at home! I avoided doing this forever because I thought it would be difficult and messy. I was wrong. This is really easy - fun even. AND it is the best tasting milk I have ever had. 

The best part is you can completely adjust the ingredients and ratio to water to suit your preferances. I will give you my base recipe - but remember to adapt it to your tastes. Thus far I have only played with using almonds and coconut to make my milk. My favorite is actually to do a blend of 50/50 coconut and almond. The pictures below just show a coconut version. I also doubled the below recipe because I know how quickly I can slurp this stuff down :).

Homemade Nut Milk

Ingredients:

1 cup unsweetened coconut shreds (or almonds - soaked and rinsed for at least one hour prior)
3 1/2 cups filtered warm water (can use more or less to adjust thickness of milk)

Optional Add-ins
1tsp vanilla extract OR 1 vanilla bean scraped
1 tsp cinnamon
small pinch of salt
sweetener or choice - agave, maple syrup, stevia, dates etc- to taste

Directions:
Combine all ingredients in blender and blend on high for several minutes. While blending, gently place cheese cloth in a strainer and position over a bowl (see photo below).

Slowly pour blended mixture into strainer and let sit for a few minutes (I normally clean-up the kitchen while my milk strains aways).  Wash your hands! Gently lift the edges of your cheese cloth and 'hand milk' the remaining pulp. This is the fun part so do not skip- you will be leaving a lot of yummy milk in the cloth if you do!

Milk will be warm but you can do a taste test here to see if you would like more sweetener or flavors.

Ready for the step by step photos?? 


It's go time!


The turbo speed is a little intense!
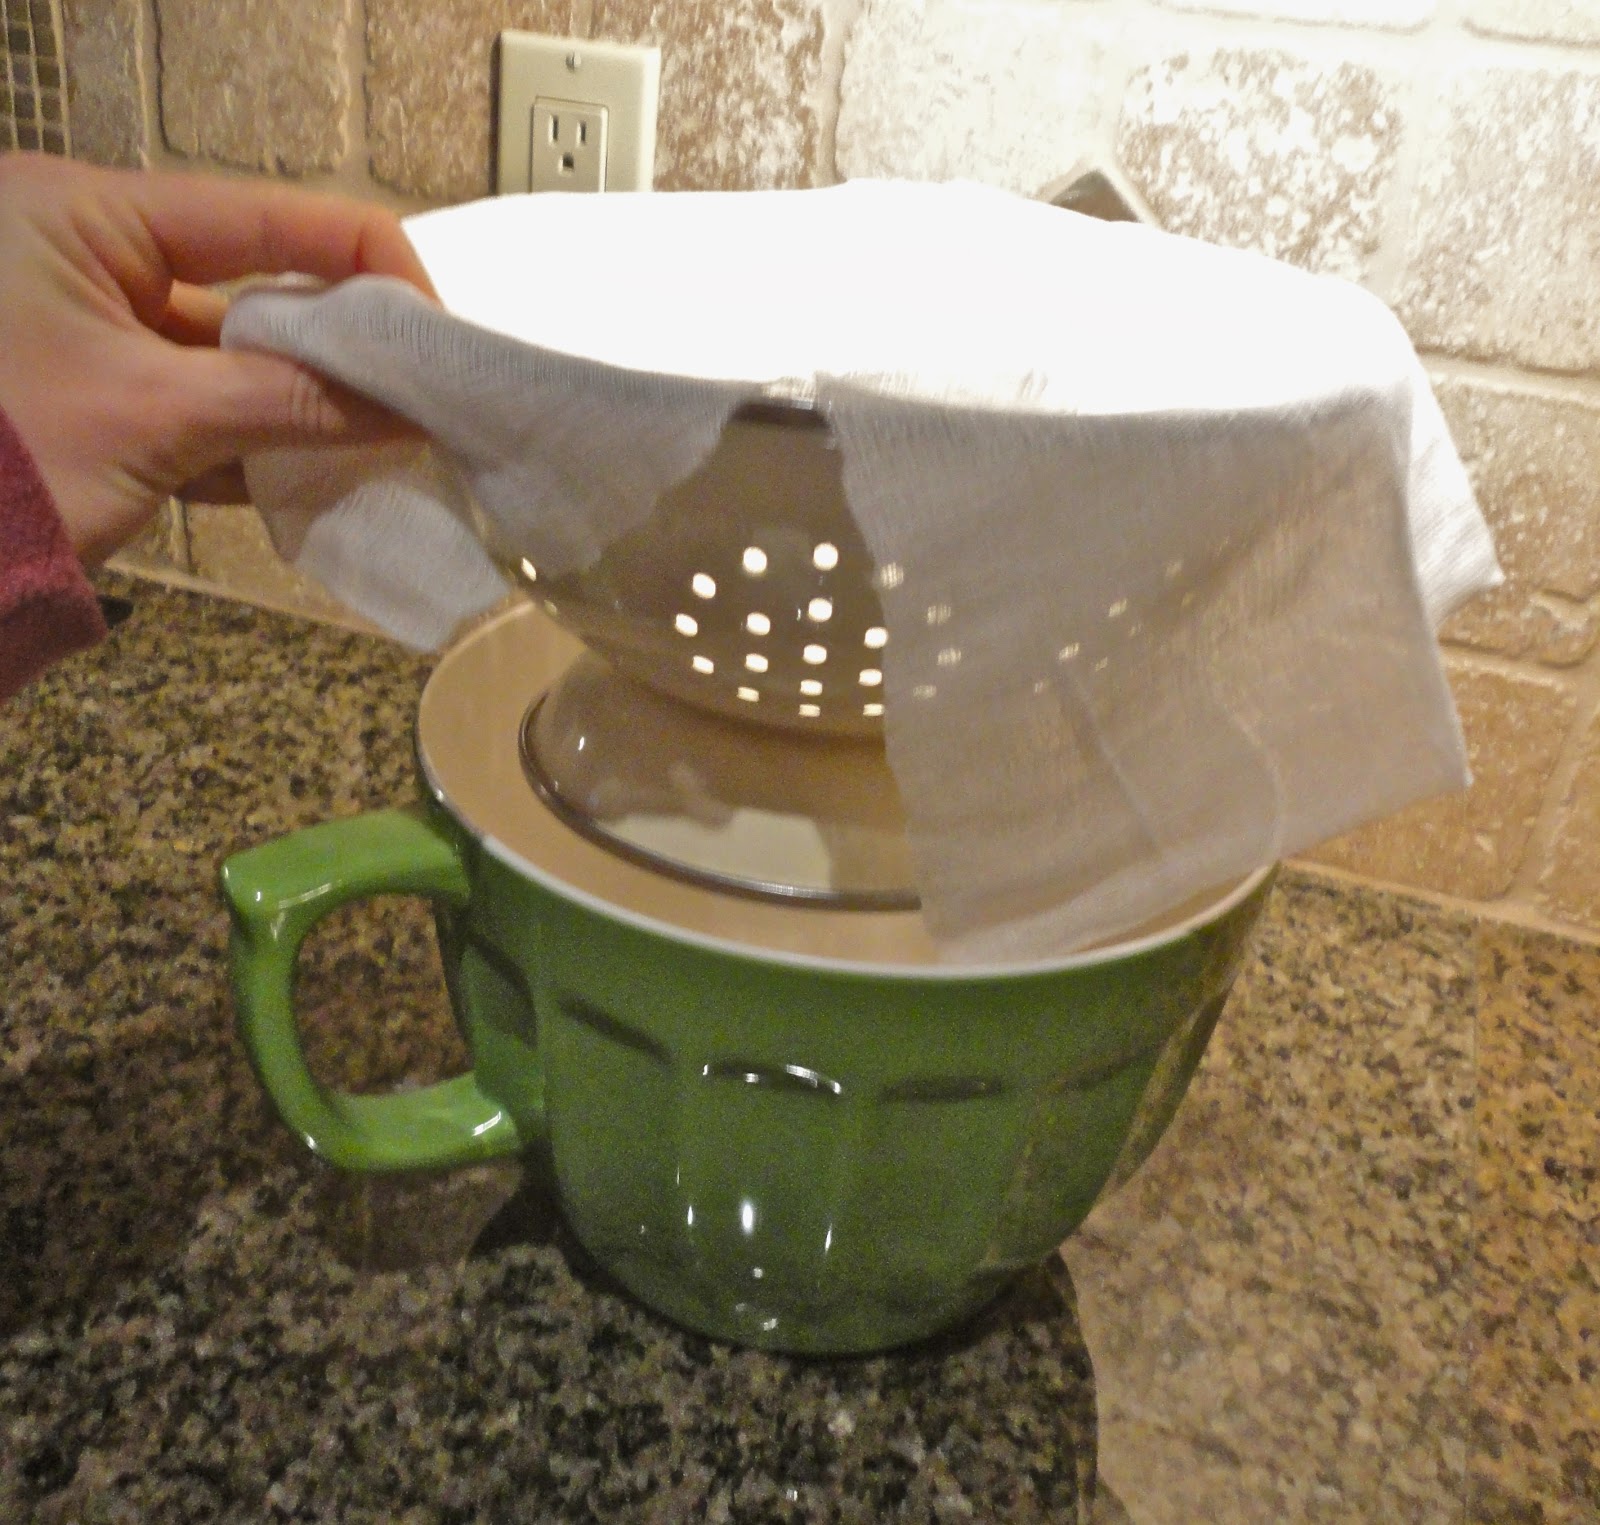

All ready with my cheesecloth, strainer, bowl trio!


Mmmm, so creamy!


Squeezing the bag. If your mind is going to funny places, you are not alone....


Silky smooth coconut milk. Tastes even better if you let it get cold! If your bowl does not have a pour spout, I highly recommend pouring the bowl of milk back into the blender before trying to pour into a mason jar or other container.


Got Milk?

February 19, 2013

South of the Border Rice Salad

I am seriously missing the flavours of summer. I think this winter is harder for me than ever before because last summer was my first year growing my own edibles.... to go from eating fresh from your garden tomatoes, basil, cilantro, blueberries and more to the more tasteless store bought veggies of the winter variety is a fairly rough transition..... 

But hey - the countdown to starting some seedlings indoors has begun.....

A couple of foods still seem to be attainable in the winter and pack the great flavours of their summertime brothers. Lime and cilantro are two friends I can count on to whisk me into a summery daydream.


South of the Border Rice Salad


I mixed up this salad in less than 10 minutes one day just using what I had on hand. I happened to have some leftover cooked rice in the fridge so I used that.... the following weekend I made the same dish but with quinoa instead of rice... both were fab!

Ingredients
11/2 cup cooked brown rice (or quinoa)
1 cup frozen corn, thawed
1 cup black beans
1 large avocado, diced
1 cup tomatoes, diced
1/2 small sweet onion, diced
1/4 cup chopped fresh cilantro
Zest  and juice of 1 lime
Fresh ground pepper and sea salt to taste

Directions:
Mix all ingredients together. If storing, make sure the avocado gets its share of the lime juice to help prevent browning.


In other news.... my ZumbAtomic class is in full swing at The Peak in Hayden! I will soon be starting a couple of additional classes through Hayden Parks and Rec also. I am having a blast with this classes and learning a lot by interacting with all these new young personalities....

Here is a lil video sneak peak of the first class!!


Stay warm and eat citrus fruits - they taste great this time of year and are sunshine to the body!

January 14, 2013

Fabulous Farro

Are you ready for another yummy grain recipe? How about a soup that gives you a big nutritious hug as you slurp it down?

Say 'helllllo beautiful' to White Bean and Kale Farro Soup!


At Costco the other day I came across a large bag of Organic Italian Pearled Farro.


Did you know that Farro is the original grain from which all others derive? Farro fed the Mediterranean and Near Eastern populations for thousands of years. Somewhat more recently, Farro was the standard ration of the Roman Legions that expanded throughout the western world.If it is good enough for those men in 300 - it should be able to get me through a Strong class! :)

One serving of Farro packs in 34g of complex carbohydrates, 6g of protein, 5g of dietary fiber and is rich in antioxidants. It is also a very anti-inflammatory food.
The best news is that it is delicious and was worked into the soup very easily. The hardest part of making this soup was trudging through the snow to harvest some very hardy kale.

I spy with my little eye...


Get in ma belly- you amazing little green super food!


White Bean and Kale Farro Soup
Makes 8 servings
Ingredients
1 tablespoon olive oil
1 cup mushrooms, minced
Braggs Amino Acid, 4-5 sprays
1 sweet onion, diced
2 medium carrots, sliced
6 garlic cloves, minced
 salt, to taste
1 cup white beans, rinsed (I used canned chickpeas)
8 cups of water
1 vegetarian bouillon cube
1 fresh bay leaf
1 cup farro, rinsed under cool water
1 bunch kale, de-stemmed and ripped into chunks
½ to ¾teaspoon red pepper flakes
Black pepper in a mill
Directions: Saute onions and garlic in OO until onions are translucent. Pour onions and garlic into large slow cooker (crock pot). Saute mushrooms in onions juice and Braggs Amino Acid for 5 minutes. Add to slow cooker.
Add all other ingredients to crock pot, cover and cook on medium for 4 hours or high for 2-3 hours. Before serving season to taste with salt, pepper or more red pepper flakes and remove the Bay leaf.
Hour 0


Hour 2.5 on High

Are slow cookers not magical?


In other news, I was lucky enough to go snowshoeing for the first time! While the short cold days do wear me out sometimes (I am writing this blog post to procrastinate going outside and shoveling yet again), the beauty of the area I live in still takes my breath away.
 Let me leave you with a couple of pictures from my North Idaho adventure. 
If you live in the area and ever want to hike, run, cross  country ski or snowshoe, please leave a comment and lets make a date!


January 8, 2013

Eggplant Bulgar Pilaf and Winter Hikes

Obviously my new years resolution was not to blog more consistently.

I hope you all had a wonderful holiday season and were able to enjoy some time with family and friends.

Now its back to reality! No more washing several ginger cookies down with a glass of So Delicious Egg Nog (don't look at me, I would never do that). No more messy house with glitter and tinsel in the strangest of places. No more crying while running on the treadmill because you just love that Christmas song your listening to that much.

The gym is busier than it has been since October and people all around are jumping back on the healthy bandwagon. It can certainly make things a littler easier for those of us who try to live a healthy lifestyle year round. I have been meeting with a lot of new people at the gym lately and part of that initial meeting is to talk about nutrition. One pattern that I see ALL the time, is well intentioned people trying to eat healthier and loose weight by restricting carbohydrates. Unfortunately, it seems that 20 years ago Dr Atkins instilled a fear of carbohydrates in us that would last far too long. I don't want to turn this into a crazy big blog on the different types of carbohydrates and why good complex carbohydrates are essential to your health- so let me cut right to the chase. The more complete, unprocessed and whole you can get your carbohydrate the better- and about 60% of your calories should be coming from these carbohydrates!

When I talk about whole grain carbohydrates I don't necessarily mean whole grain breads and pastas. While these foods are not evil and certainly better than their white counterparts, I am trying to get even grainier! Think oats before they have been turned into oatmeal bread, think qunioa, barley, millet, farro, rice, bulgar, wheat berries, and kasha. These grains are nutrient powerhouses filled with great complex carbohydrates, fiber, protein and depending on the grain, a whole slue of other nutrients.

While most of us do not have a millet recipe right at the top of our heads, many of these grains are easier to incorporate and cook with than you would imagine. My goal is to spend my next few blog posts sharing recipes incorporating one of these grainular powerhouses.

Eggplant and Bulgar Pilaf
(Makes 6 servings)
This pilaf is great served warm but also makes a yummy cold pilaf salad the next day. Feel free to add in vegetables that you prefer or have on hand and season to your taste- next time I'm going to add mushrooms.

Ingredients

1 cup bulgur (see Note)
4 tablespoons extra-virgin olive oil, divided
1 pound eggplant (see Tip), diced
1 medium onion, diced
1 large carrot, peeled and shredded
2 large cloves garlic, minced
2 tablespoons tomato paste
2 Roma tomatoes, diced
1 teaspoon dried oregano or Italian seasoning mix
3/4 teaspoon salt
Freshly ground pepper to taste
1/2 cup vegetable stock (optional- I did not need)
1/2 - 1 cup chopped flat-leaf parsley or cilantro

 Preparation

1. Place bulgur in a large deep bowl, add enough warm water to cover by 2 inches, cover and let stand for 1 hour. Drain; set aside.

2. Heat 3 tablespoons oil in a large nonstick skillet over medium heat. Add eggplant. Do not stir for the first minute; then cook, stirring, until beginning to soften, 4 to 5 minutes. Push the eggplant to the sides, making a well in the middle for the other ingredients.

3. Heat the remaining 1 tablespoon oil in the middle of the pan. Add onion, carrot and garlic. Do not stir for 2 minutes; then mix all the ingredients, including the eggplant, and cook, stirring, until the vegetables are soft, 3 to 4 minutes.

4. Reduce heat to medium-low. Make a well in the ingredients again and add tomato paste to the middle. Do not stir for 30 seconds; then turn the tomato paste over and cook for another 15 seconds. Add the drained bulgur, tomato, oregano, salt and pepper; stir well to combine. Heat through. If the eggplant is not completely tender, stir in broth, cover the pan and simmer until the eggplant reaches your desired tenderness. Remove from the heat; stir in parsley (or cilantro).

Tips & Notes

Note: Bulgur is made by parboiling, drying and coarsely grinding or cracking wheat berries. Bulgur just needs a quick soak in hot water for most uses. Look for it in the natural-foods section of large supermarkets, near other grains. I get mine from The Flour Mill Natural Foods in Hayden.

Tip: If you’re using large, common globe eggplant, which can be more bitter than other varieties, salting beforehand can reduce bitterness. To salt: Place prepped eggplant in a large colander and sprinkle with 1 tablespoon salt. Let sit for 30 minutes to 1 hour before using. Rinse well with cold water.

Nutrition Per serving: 214 calories; 10 g fat ( 1 g sat , 7 g mono ); 0 mg cholesterol; 29 g carbohydrates; 0 g added sugars; 5 g protein; 9 g fiber; 357 mg sodium; 533 mg potassium.

Nutrition Bonus: Vitamin A (64% daily value), Vitamin C (62% dv), Magnesium (17% dv), Potassium (15% dv)


I find that I get a little more sedentary in these colder months. In the summer I am gardening, running, riding my bike and generally just moving more. I try to remember that all types of weather can be enjoyable to get outdoors in - some of the funnest runs I have been on have been in the pouring rain. That being said I am not a fan of running on ice - however, a snowy hike is right up my alley. I finally forced enticed Thor into going on a winter hike with me - we ended up having a great time and I took a couple of photos to share with you!


What are your favourite ways to get outdoors in the winter months?


October 22, 2012

Pumpkin Soup


I missed my Silent Sunday post this week but here is the picture I would have posted had I made it to a computer..... 


Eeek! Talk about "Happy Halloween"! This spider found a new home in my shoe and had to be coaxed out by the brave and rugged Thor. I did actually take this photo though - anyone who has known me a while knows that I must have come a long way to get this close to this spider! I have since learned that this is a Cat Spider (his HUGE back looks like a cats head- the points are the ears) and is non-poisonous and beneficial in the garden for killing insects. They create beautiful big webs and do not like to venture indoors. Thor and I decided not to kill this guy and set him out in a home away from my shoes.... 

I am going to be wearing large gloves next time I'm pick up leaves....


Good thing we had a warm and hearty dinner to sooth our souls. I created this Pumpkin soup from a variety of recipes. It was the perfect combination of savory and sweet, light and filling and healthy and delicious. 


Pumpkin Soup

Ingredients:
1 sweet onion
1 clove garlic
3 lrg carrots, diced
2 stalks celery, diced
4-5 whole cloves
3 cups pumpkin puree
6 cups vegetable broth
2 tsp cinnamon
pinch of nutmeg
salt and pepper to taste
1/4 cup canned coconut milk
2 tbs pure maple syrup

In a large pot, saute onions and garlic until onions are translucent. To make the recipe oil free, I sautéed in a splash of the vegetable broth. Add carrots, celery and cloves and continue to cook until carrots are fork tender. Add the pumpkin and vegetable broth and bring to a simmer. Remove cloves. Using an immersion blender, blend the soup until lumps are gone. You can also do this by transferring your soup to a blender or food processor. Return soup to a light simmer. Taste and add cinnamon, nutmeg, salt and pepper to your preferance. Stir in coconut milk and maple syrup. Serve immediately or store in the refridgerator. 

I would assume this soup will freeze well though I have not yet tried it.

Garnish with a dollop of coconut cream and a drizzle of maple syrup.


Tenn Sense Shout Out!

I wanted to finish todays post with a blog shout out to a fellow blogger, leader, amazing mother, army wife and friend. Her name is Amy and her blog is Tenn Sense. Amy writes about her family and their day to day joy, pain, successes and struggles as an army family, away from 'home' and raising a beautiful daughter with special needs. Tennyson was born very early (I think I remember Amy saying she was a little over 2lbs) and has had to fight many battles already just to live and interact in the same world as the rest of us.

Every time I see a new blog post up from Amy, I am so excited to read it. Not only because Amy is sharing a special peak into her amazing family, but because Amy shares this peak in such a beautiful and honest way. I have known Amy since high school and I knew very quickly after meeting her that this was one tough lady who did not hold back and was not afraid of saying how she felt, but I had no idea that this would transfer into some of the most beautiful writing I have ever read. There's no poetry, no fancy word choices and no flashing colours. Its just real.

Take a few moments to visit Amy and her growing family over at Tenn Sense. I know that you will be glad you did.


October 18, 2012

Baked Pumpkin Oatmeal

Fall is officially here. While I deeply mourn the loss of warm days, fresh heirloom tomatoes and sun kissed skin - there is a soft spot in my heart for the robust flavours of cinnamon and nutmeg. I could eat fall inspired foods morning, noon and night - in fact many days I do. My favourite way to kick-off a crisp fall morning is with baked oatmeal. While baking my oatmeal will never fully replace the gooey stove top version in my life, I do enjoy it as a little mid-week switcharoo.... I'm wild...

You could bake many versions of this oatmeal- Apple Pie, Berry Cobbler, Banana Nut Butter etc....
My favourite is Pumpkin Pie.


Pumpkin Pie Oatmeal

Ingredients:
1/3 cup old-fashioned rolled oats
1/3 cup pumpkin puree
1/3 cup almond milk, unsweetened (or milk of choice)
1 tbsp maple syrup
1/2 tbsp chia seeds
1/4 tsp vanilla extract
1/2 tsp cinnamon
    pinch of nutmeg and salt
    Optional Add-in: raisins or walnuts

Preheat oven to 380 degrees. Mix together all ingredients in an oven safe ramekin or bowl. Bake for 18-20 minutes or until firm. You can broil the top crust for an additional minute if you wish. Serve with a sprinkle of cinnamon, a splash of almond milk or a dollop of coconut whipped cream! (From my chocolate cake recipe)


I foresee many more pumpkin recipes in our near future.... today I will be baking my Pumpkin Spice Muffins for by Friday Biggest Loser muffins! 4 weeks of everyone weighing-in and turning in their homework! Go Team!

October 13, 2012

I'm Back...With Chocolate Cake!!!

I must have composed my next blog post two dozen times in my head. My last post was in June and it seems like yesterday and like a lifetime ago all at once. I am not under any false pretense that my blog was an important part of anyones lives, though I know that there are a few of you out there that do read very consistently and I thank you for that. I think that I am the one that likely missed my blog posts the most. 

Too me this is a type of diary and a social and creative outlet unlike any other. I feel held to a high standard to be as honest and forthright with my blog writing as I am when I talk to myself. Maybe that is why I have not blogged in a few months. While some exciting and great things have happened, there have also been events that maybe I am not ready to put to paper keyboard. 

Maybe that is OK. Maybe I can share what I wish to share and let the rest come out naturally on its own. I have so missed this ritual and am so happy to hear the clicking of keys once again as I type this. 

One of my big motivations to return was a delightful recipe that I received many requests for. I knew that writing up the recipe on my blog and posting was the easiest way to share and so here I am. 

This past month I launched a new nutrition program from my home called Plant Strong. This is something that I have wanted to do for a long time and I finally decided just to go for it. The program was a great success and I was so pleased with the amount of interest and support that this program received. I limited my first group to 8 people since we would be meeting in my home and I wanted to make sure that I got a chance to really get to know each person over the course duration of 4 weeks. 

Each week I provided a nutrition lesson, Plant Strong recipes , recipe samples and a cooking demonstration. I think I can speak for the group when I say that we had a fantastic time and we all learned so much from each other. For the final week, I asked to group to bring their own Plant Strong dish and recipe to share with the group. I was so blown away by the yummy foods that came into my kitchen from carrot soup to pizzas to golden flax seed bread with coconut whipped cream. 

The dish that I prepared for the group was of course a dessert..... anyone who had read my blog before knows that I have a terrible sweet tooth. The person who has read my blog before also knows that I don't just bake sweets the 'normal' way....


Chocolate Cake With a Plant Strong Secret

Ingredients:
3/4 cup whole wheat pastry flour
1/2 tsp baking soda
1/2 tsp salt
1 tsp baking powder
1/4 cup unsweetened cocoa powder 
2 tbsp ground flax
1/3 cup pure cane sugar
1/4 cup sugar replacement (stevia) or more sugar
3/4 cup semi-sweet chocolate chips 
1 tbsp pure vanilla extract
2 loosely-packed cups frozen cauliflower, thawed completely but not cooked  (Or omit and sub 1 cup canned pumpkin, if cauliflower is too weird for you. I cant wait to try the pumpkin version )
1/2 cup milk of choice. For pumpkin version, use just 1/3 cup milk 
3 tbsp unsweetened applesauce

Preheat oven to 350F, and grease an 8×8 square or 9 inch round baking dish. Combine all dry ingredients in a bowl, and mix very well. Combine all liquid ingredients and the cauliflower in a food processor and blend until super-smooth, so there are NO lumps whatsoever.
Pour wet into dry, and mix until just combined, then pour into prepared pan and bake 30 minutes or until a toothpick inserted in center comes out clean. Let cool completely.

If making a double layered cake like I did, double the ingredients and bake in two round 9in pans.


Avo-Yum Chocolate Frosting

Ingredients:
2 avocados
1/2 cup raw agave or sweetener of choice (I LOVE making date paste)
1 cup cocoa powder
1 tbs vanilla extract
a tiny pinch of salt

Combine all ingredients in a food processor and process until smooth. Feel free to play with different additions.... instant coffee grounds, coconut, cinnamon, mint extract etc....


Coconut Whipped Cream

Ingredients:
1 can full fat canned coconut milk (placed in refrigerator at least overnight)
1 Tbsp sweetner of choice (agave, sugar, maple syrup or stevia work well)
1/2 tsp vanilla

Open can of coconut milk upside down. Pour liquid into a container to be saved for future culinary uses. You will be left with the “solid” coconut milk on the bottom. Scrape in a large bowl and beat on medium/high with an electric mixer until light and fluffy and soft peaks form. Add-in sweetener to taste and vanilla. 

A great recipe to get creative with- add flavors of choice such as mint, coconut, almond extract etc...


Assembling the Cake

I spread my vanilla Coconut Whipped Cream on one of the 9 in cakes and then gently placed the 2nd cake right one top. I frosted the whole cake with the Avo-Yum frosting. I placed dollops of the Whipped Cream around the top of my cake and sprinkle coconut shreds on top for a special touch.


There is a lot of work to be done on the blog..... my 'Recipe Archive' is a mess and my 'About Me' and 'Contact' is completely out of date... 

But for right this moment, lets just eat some chocolate cake.

June 4, 2012

MORE Banana Nut Muffins


I know that this is not the first time I have posted a Banana Nut Muffin recipe. Maybe not even the second time.... BUT how do you not love turning too old to eat bananas into sweet healthy treats. With this recipe I decided to try and go so healthy I would feel good about eating these for breakfast.... no sugar, no butters, no oils. Leave that stuff out and bring on the yummy factor.


Banana Nut Muffins

Ingredients:
1 1/2 cups whole wheat flour
1 cup  oats
1 tsp baking powder
1 tsp baking soda
2 tbsp unsweetened apple sauce
1/2 cup maple syrup
2 tbsp flax seed powder + 4 tbsp water
1 cup mashed banana (about 3 bananas)
6 tbsp nut butter (I used a mix of walnut and almond, but any nut butter is fine)
3/4 cup water
2 tsp vanilla
2 tsp cinnamon
1 tsp nutmeg


Directions:
Mix flax seed powder and water, keep it aside.
Combine all the dry ingredients and mix well.
In a separate bowl, stir oil and nut butter. Now add the mashed banana, flax seed and water mixture, 3/4 cup water and mix well. Pour the wet ingredients into dry ingredients and mix till everything is combined. Add the spices and lightly mix in. 
Spoon them into greased muffins tray - regular or mini sized work well.
Bake in a preheated oven at 350 degree F for 20-25 minutes or till the toothpick inserted in the center comes out clean.


Are you sick of pictures taken around my yard yet???? If you are now might be a good time to stop looking... BUT there is an awesome Iris picture to come.... 

Enjoying the colours of Spring.

I am smitten with these Iris's!


This might be one of my favourite pictures... 


I just love these pinks and greens.


Green tomatoes! 


My veggie patch is coming right along.... Do you like the weed that is front and center there?!

June 1, 2012

Guacamole!!!


Guacamole! 

Considering my deep passionate love for avocados I can not believe that I have not yet made guacamole. I think that I just end up eating them straight from their shell and have not taken the 5 minutes to turn them into this amazing little side.

So easy and super addictive. Lets just get to the recipe..

Ingredients
3 ripe avocados
Juice of 1/2 lemon
3 cloves of garlic
2 TBS Salsa
2 TBS fresh minced cilantro
1 TBSP fresh minced mint
1 tsp cumin seeds
salt and pepper to taste

1. Just mix it all together! I Mashed 2 of the avocados and left one of them diced so I would have some nice chunks in there. 
2. Try not to eat the entire batch in one sitting.... at least share it!

3. Have fun with this recipe... next time I want to roast the garlic..... yum!


Avocado Fun Facts!!

*Did you know that avocados contain all 18 essential amino acids. These means that they are a complete source of protein all on their own! As an added bonus they also contain fiber, which make those muscle building blocks even easier for your body to digest and use!

*Avocados contain healthy fats that help your body boost your HDL's or "good cholesterol". These help the body fight free radicals and prevent diabetes.

*Avocados are anti-inflammatory! Thanks to the power house of nutrients contained in these green wonders. Serve this guacamole to your family members who suffer from arthritis.

*Avocados are also know are 'Crocodile Pears'.

*The portion of the avocado closest to the skin in the most dense in nutrients. Be sure to scrape this part clean with a spoon!


May 27, 2012

Nutty Potato Salad

Once again, lets skip the whole "Its been a long time - so much to catch up on!" thing and just get right to the blog post....


As you likely know, I am living in a new house this spring. The lady before me did a wonderful job with planting a beautiful array of trees, shrubs, plants and flowers and I am having so much fun watching things come up from winter hibernation. Check out these two photos below that had less than a month between them.


The crazy part is this was taken in mid-may and I already need to take another photo it has grown so much! Very exciting but also scary.... lets just pray that I don't kill everything and turn it into a big rock and dandelion patch.....

Thor's parents are here visiting for memorial day weekend and his mum was able to identify a chive plant right in that island.

Chives!!! After getting over my immediate craving for sour cream and chive potato chips, I did a little chive research.... did you know that pom pom flowers and buds on a chive plant are also edible??

Memorial day weekend and I have chives.... naturally this calls for potato salad.

But not just any gloopy, mayo loaded, artery clogging potato salad... I wanted a feel good, vegan, oil free, mayo free, protein packed potato salad that would knock your grandmas sock off......


Some recipes take trial after trial after trial to get them right. This is not one of those recipes. I was in love at first taste.

Nutty Potato Salad

Ingredients:
2-3lbs red skinned potatoes, chopped into bite size pieces
1 cup cashew butter
1 cup almond milk
1 TBSP Ground Flax Seed
Juice of half a lemon
Sea Salt 
Ground Pepper
1/2 Sweet onion, sliced
1 Red Bell pepper, diced
2 TBSP fresh chives, chopped
Chive flowers and buds for garnish, optional

Directions:
1. Boil your potatoes in water is a pinch of salt, until fork tender. Strain and allow to cool.
2. While the potatoes are boiling, your can prepare the sauce. In a food processor or high speed blender,   blend cashew butter and milk until creamy. You can add more cashew butter or milk depending on how thick and creamy you want your glaze to be. More cashew to milk for a thicker mixture.
3. Add in flax seeds and lemon juice and continue to mix. Add in salt and pepper to taste. 

At this point the base should taste to good your are considering eating it out of the food processor with a spoon. Play here to make it just right for you. More lemon? More salt and pepper? Maybe some curry powder? Get crazy.....

4. In a large bowl, stir together the onion, bell pepper and chives. Mix in your cashew cream mixture. Another taste test here is perfectly acceptable. :)
5. When the potatoes have cooled, gently toss them into your large bowl with the cream mixture to coat. Garnish and refrigerate until ready to serve.


Packed with tasty goodness and protein while containing non of the saturated fat and empty calories of a traditional potato salad, this version might just be your go to recipe for many years to come.

One last thought.....

Please keep in mind this memorial day, the reason for the national holiday. Between the camping and food and time outside, take a moment to honour those who have sacrificed so much for our freedom.